How to Paint Rocks - An Essential Guide for Beginners: Tips, Tools and Techniques
Rock painting is a fun and creative way to express yourself, both for beginner and experienced artists. From selecting the right materials to learning helpful techniques, there’s so much to explore. In this guide, we go through the most common questions about painting rocks, offering tips and insights to make your artistic journey easier and more enjoyable. Whether you're looking for basic advice or advanced tips, the information we have gathered here has everything you need to get started and perfect your skills.
Where can I find rocks suitable for painting?
Finding rocks for painting is actually quite easy! You can search for them in parks, along beaches, or by riversides. Look for smooth, flat stones. These are the perfect canvas for your creativity. If you’re not keen on scavenging outdoors, craft stores and gardening centers often sell rocks meant specifically for painting. Alternatively, online retailers have a wide range of options, too. Just remember, the smoother the surface, the better the painting experience. Always check that you're not taking rocks from protected areas or public lands where it's not allowed. A little rock hunting is good for both your art and the environment!
Do I need to clean the rocks before painting them?
Absolutely! Cleaning your rocks is a crucial first step. Any dirt, dust, or debris left on the surface can interfere with your paint’s ability to stick properly. Simply wash the rocks with soap and water, using a scrub brush to remove any dirt or residue. For stubborn grime, a vinegar solution can help. Once washed, let them dry completely before you start painting. If your rocks have rough spots or natural grooves, consider giving them a light sanding to ensure a smooth, even surface for your artwork to shine.
Should I apply a base coat to the rocks?
A base coat can make a world of difference when painting rocks, especially if your stones are dark in color or have an uneven texture. A solid, white or black acrylic base coat helps to create a neutral surface that makes your paint colors pop. This is especially important if you want brighter, more vivid hues. Applying a base coat also prevents the rock’s natural color from affecting the final look of your design. It’s not strictly necessary, but it’s definitely a trick that can help your art look more professional and polished.
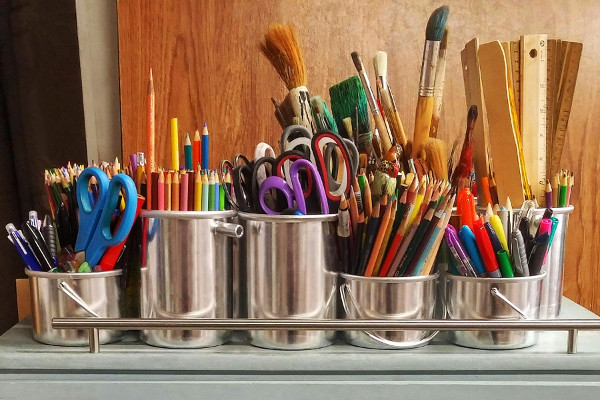
What type of paint is best for rock painting?
When it comes to rock painting, acrylic paint is your best friend. Why? Because it’s versatile, vibrant, and dries quickly – making it perfect for creative projects like this. Acrylic paint sticks well to stone surfaces and can withstand both indoor and outdoor conditions. If you're planning to display your rocks outside, be sure to use outdoor-grade acrylics that will hold up against the weather. Plus, the best part is that it’s easy to clean up – just soap, water, and a little elbow grease! Whether you prefer matte or glossy finishes, there’s an acrylic paint for every style.

Can I use paint pens instead of brushes?
Yes, you can. Paint pens are a fantastic alternative to traditional brushes, especially when it comes to adding intricate details or doing fine line work. They’re easy to handle, and their precision allows you to draw or write clearly on your rocks without the messiness of brushes. For beginners, they’re a great tool to create neat and clean designs. However, for larger sections of your rocks, you might still want to use regular acrylic paint and brushes to cover more surface area quickly. But paint pens are a must-have for any detailed artwork or lettering!
How do I seal my painted rocks?
Sealing your painted rocks is an important step to ensure your artwork lasts. It protects your designs from the elements, particularly if you plan to display your rocks outdoors. Use a clear acrylic sealer, either spray-on or brush-on, depending on your preference. Make sure to apply thin, even coats, allowing each layer to dry before applying the next. A good sealer will not only protect your paint but also enhance the colors and give your rocks a glossy finish. For outdoor rocks, make sure to use a weatherproof sealer that can handle rain and UV exposure.
Is it necessary to seal indoor-painted rocks?
While sealing your indoor rocks isn’t strictly necessary, it’s a great way to protect your work, especially if you plan on handling the rocks or moving them around. A good sealer can provide a beautiful, glossy finish, enhance the colors, and keep dust or dirt from settling on the surface. If your rocks are just decorative pieces and won’t be moved much, you can skip sealing them. However, if you want to preserve their vibrancy and protect them from accidental smudging or wear, sealing them is a great way to give them an extra layer of protection.
What do I do with my painted rocks after completing them?
Once you’ve finished your rock painting masterpiece, the possibilities are endless! You can use them as unique garden decorations, paperweights, or even display them as part of your home decor. Many people love hiding their painted rocks in public places for others to find, spreading messages of kindness and positivity. It’s a fun way to connect with others, too! If you’re feeling charitable, painted rocks can also make thoughtful gifts. Just remember to seal them first, especially if you’re placing them outside, to keep your design protected and vibrant.
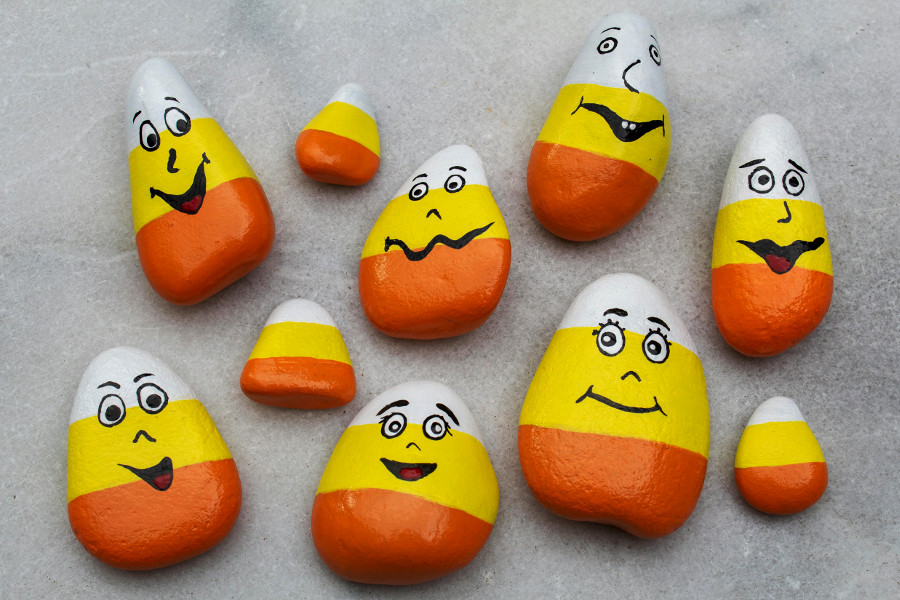
Are there specific designs that are easier for beginners?
If you're just starting with rock painting, don’t worry, there are plenty of simple designs that will help you build confidence and skill. Start with basic shapes like dots, lines, or stripes. Polka dots are a great place to begin, as they allow you to practice consistency and spacing. Geometric patterns and minimalist designs like hearts or flowers also work well. Once you get comfortable, you can begin to experiment with more detailed images like animals, landscapes, or mandalas. But remember, even the simplest designs can be beautiful when done thoughtfully!
Can I paint over mistakes?
Yes, and that’s one of the best parts about rock painting! Mistakes aren’t the end – they’re just part of the creative process. If you mess up, simply let the paint dry, and then cover the mistake with a new layer of paint. Whether you’re fixing a stray line or correcting a color, you can always go over your design with the base coat to start fresh. Don’t be afraid to experiment and try again. Acrylic paints are incredibly forgiving, so feel free to make adjustments until you’re completely happy with your rock.
What size rocks are best for painting?
When you're first starting out with rock painting, aim for medium-sized stones, around the size of your palm. These rocks are big enough to allow for some creative freedom, but not so large that they feel overwhelming. Smaller rocks are perfect for more intricate details or for hiding, while larger rocks are great for bold, eye-catching designs. The most important factor is to pick rocks that are smooth and flat. This will make your painting process much easier and more enjoyable. Size matters, but comfort and ease of use are key!
Can I use glitter or other embellishments on my rocks?
Of course! Glitter, rhinestones, and other embellishments can really take your painted rocks to the next level. A little sparkle never hurt anyone, right? Just be sure to attach your embellishments securely and let them dry properly before sealing your rock. You can apply glitter over wet paint to create a dazzling effect or use small beads and rhinestones to add texture. Remember that adding these decorative elements can make your rocks more visually striking, but they also require extra care to ensure they stay in place.
How do I store my painted rocks before sealing them?
Before sealing your painted rocks, you’ll want to make sure they’re completely dry. Place them on a clean, flat surface, such as a tray or parchment paper, away from any dust or dirt. It’s best to store your rocks in a cool, dry area while they dry, especially if you’re working on multiple designs at once. Once they’re fully dry and ready for sealing, handle them carefully to avoid smudging. If you plan to store them long-term before giving them away or displaying them, make sure to keep them in a safe spot where they won’t get damaged.
Can children participate in rock painting?
Rock painting is a fantastic activity for children. Not only does it encourage creativity, but it also helps develop fine motor skills. Younger kids can enjoy simple designs like handprints, dots, or basic shapes. Older children can experiment with more detailed pictures and patterns. Just make sure to use non-toxic paints and supervise the process, especially when it comes to applying sealers or handling paintbrushes. This activity is perfect for family fun, and kids will love seeing their artwork come to life on stones.
Are there communities or groups dedicated to rock painting?
Yes! There are tons of communities and groups where rock painters from all over the world come together to share ideas, techniques, and inspiration. Social media platforms like Facebook, Instagram, and Pinterest have dedicated groups where you can post your designs, join challenges, or participate in rock hunts. The r/rockpainting sub on Reddit is a popular online place where you can connect with fellow rock painters. These communities not only give you a place to show off your artwork but also create a sense of connection and encouragement. Whether you’re a beginner or an experienced artist, joining a group can help you learn, grow, and get inspired by others’ creations.