How to Learn to Sew: Essential Tips, Techniqes, Tools and Advice for Total Beginners
Are you ready to dive into the world of sewing? Whether you're just starting or looking to refine your skills, this guide covers 15 of the most common questions beginners ask. From choosing the right tools and fabric to mastering basic stitches and troubleshooting machine issues, we’ve got you covered. By the end, you’ll feel more confident and prepared to tackle your first projects. Let’s explore the essentials of learning to sew and turn your creative ideas into reality!

What tools and materials do I need to start sewing?
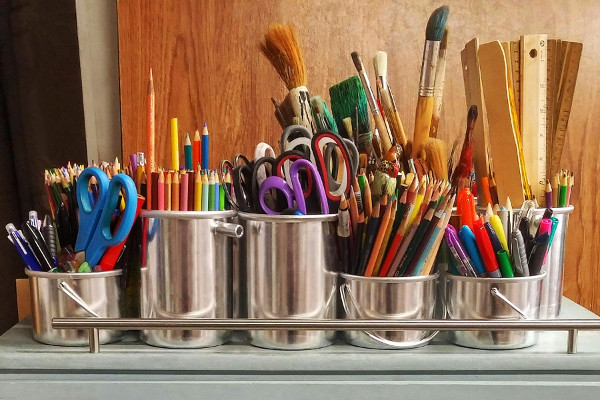
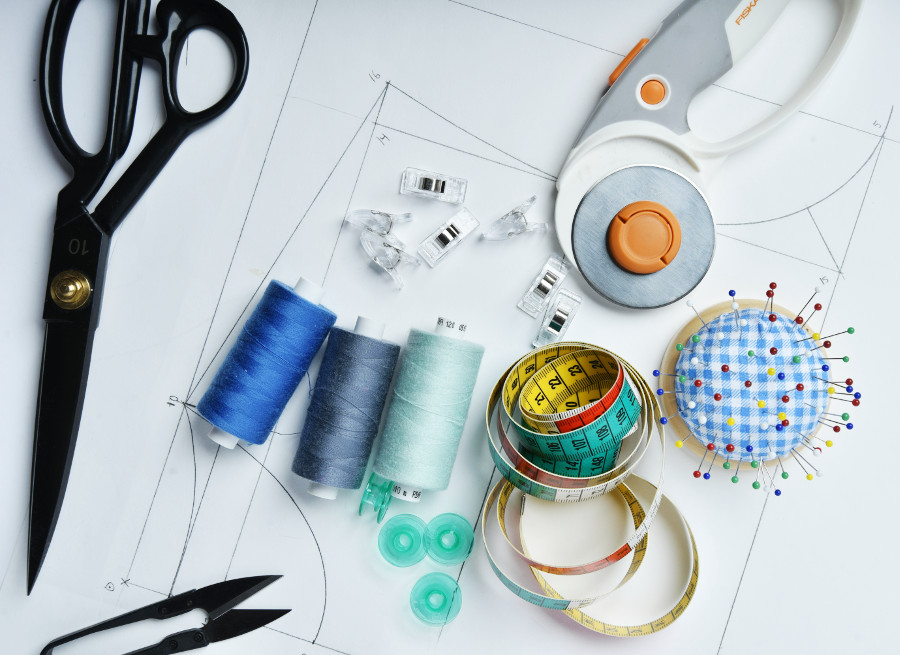
Sewing is like a creative journey, and to begin, you’ll need just a few essentials. A sewing machine is your trusty companion – it’s where the magic happens. But don’t forget the basics: fabric, thread, scissors, pins, a measuring tape, a seam ripper, and of course, needles. Choosing the right fabric is like selecting your canvas, so start with cotton – it’s forgiving and easy to handle. You'll also want an iron and ironing board to press out your mistakes (or more likely, to perfect your pieces). A sewing kit with extras like safety pins or fabric markers never hurts either. With these tools, you're ready to create!
How do I choose the right sewing machine for beginners?
When choosing your first sewing machine, it’s all about balance – simplicity, durability, and versatility. You want a machine that won’t overwhelm you but still has the essentials. Look for machines with basic features like straight stitches, zigzag stitches, and adjustable stitch length. A user-friendly model with an automatic needle threader and easy bobbin winding can make a world of difference. Popular brands like Brother, Singer, and Janome are known for their reliability and ease of use. Remember, the best machine is the one that fits your needs, not the one with the most buttons!
What are the essential hand stitches every beginner should learn?
Hand-stitching is your gateway to mastering the art of sewing. Start with the basics: the running stitch, perfect for simple seams; the backstitch, which makes your seams strong and durable; the whip stitch, great for finishing hems or edges; and the slip stitch, which is nearly invisible and perfect for hand-finishing hems. Each stitch has its purpose, and learning them will give you confidence and versatility in your sewing. Start on scrap fabric to practice before diving into your first project. Before you know it, you'll be stitching like a pro, no machine required!
How do I read and understand sewing patterns?
Reading sewing patterns is like decoding a secret language. First, familiarize yourself with the pattern envelope, which tells you everything you need to know about fabric types, sizing, and necessary notions (like buttons or zippers). Once you have your fabric ready, lay out your pattern pieces according to the grainline (trust me, it matters). The instructions inside will guide you step by step – think of them as your personal sewing GPS. Notches, darts, and seam allowances will be your guideposts, helping you stitch everything together seamlessly. Soon, you’ll be interpreting patterns like a seasoned pro.
What fabrics are best for beginners to sew with?
As a beginner, the fabric you choose is just as important as the sewing technique you’re learning. Start with something forgiving – like cotton. It’s easy to cut, sew, and press, making it the perfect choice for beginners. Linen and denim are also solid options once you’re ready to step it up. Avoid slippery fabrics like silk or satin, which can be difficult to manage, and stretchy fabrics like spandex, which require specialized techniques. By starting with the basics, you’ll build your skills and confidence, and soon you’ll be comfortable working with a variety of materials.
How do I prevent my sewing machine from skipping stitches?
Skipping stitches can be frustrating, but luckily, it’s usually a quick fix. First, check the needle – it should be properly inserted, and make sure it’s the right type for your fabric. If the needle is old or dull, replace it. Adjust your machine’s tension settings; if the thread tension is too tight, it can cause skipping. Cleaning your machine regularly is key – dust and lint in the bobbin area can also cause issues. Finally, ensure that your thread is unwinding smoothly from the spool and bobbin. With these tweaks, your sewing machine should be back to running smoothly in no time.
Why does my thread keep breaking while sewing?
Thread breaking is a sign that something isn’t quite right, but it’s usually an easy fix. First, make sure your thread is correctly threaded through the machine’s guides, including the needle. If your machine’s tension is too tight, it can cause the thread to snap, so adjust it for smoother stitching. Check the quality of your thread too – old or cheap thread is more likely to break. Additionally, if the needle is damaged or bent, replace it. With a little troubleshooting, you’ll stop the thread from breaking, and get back to creating in no time.
How can I fix puckering seams in my projects?
Puckering happens when your fabric gets pulled too tight during stitching, but with a little adjustment, you can smooth things out. Start by increasing your stitch length to avoid pulling the fabric too much. You can also loosen the machine’s tension to give the fabric some breathing room. Use the right presser foot – some fabrics need extra support, like walking feet for knits or heavy materials. Press your seams with an iron to help them flatten out. And if you’re working with delicate fabrics, consider using a stabilizer to prevent any unwanted wrinkling. Soon enough, your seams will look flawless.
What are some simple sewing projects suitable for beginners?
If you’re just starting out, keep things simple! A pillowcase or tote bag is a perfect first project – they’re both easy and practical. Skirts and simple quilts are also great for honing your skills without overwhelming you. If you want to practice hand-stitching, a cute headband or even a decorative cushion can give you a taste of creating something personal. These projects help you get familiar with your machine, improve your technique, and build your confidence. And remember, the more you sew, the better you’ll get, so don’t be afraid to try something new as you go.
How do I hem pants and skirts properly?
Hemming pants and skirts is easier than it sounds! Start by measuring the desired length, and mark it with fabric chalk or pins. Fold the fabric to the right length, then press it with an iron to create a sharp crease. Now, sew the hem – use a straight stitch for a basic hem, or if you want it to be nearly invisible, try a blind hem stitch. For pants, make sure the hem is even all the way around before stitching. And don’t forget to press the hem one more time to give it a clean, professional finish.
Can I sew without using patterns?
Absolutely! Once you’re comfortable with sewing basics, you can definitely sew without patterns. In fact, some people find designing their own pieces to be the most fun part of sewing. You can measure yourself or others to create your own designs, whether it’s a simple skirt, top, or bag. Freehand sewing allows you to experiment with shapes and fabrics without being tied to someone else’s blueprint. Sure, patterns can be helpful, but the freedom of creating your own designs can be incredibly satisfying, and it allows you to truly make something unique.
What should I do if my sewing machine is jammed?
If your sewing machine is jammed, don’t panic – it’s usually a quick fix. First, turn off the machine and remove the fabric. Check for any tangled thread, especially in the bobbin case, and remove it carefully. Clean out the lint and dust from the bobbin area with a small brush or compressed air. Re-thread the machine properly and check the bobbin to make sure it's inserted correctly. If everything looks good, turn the handwheel to see if the machine operates smoothly. If the problem persists, consult your machine’s manual or take it in for a professional checkup.
How do I gather fabric evenly for ruffles or skirts?
Gathering fabric is easier than you think – just sew two parallel lines of long, loose stitches along the edge of the fabric. Leave long thread tails at both ends. Then, gently pull the thread tails to gather the fabric until it’s the desired length. As you gather, distribute the fabric evenly along the threads, and pin it to the waistband or whatever you're attaching it to. Once everything looks good, sew the gathered fabric in place. Voilà! You’ve got yourself a beautiful ruffle or gathered skirt. It’s simple, but the effect is stunning.
What is backstitching, and why is it important in sewing?
Backstitching is a key technique to make your seams stronger and longer-lasting. It’s done by sewing a few stitches backward at the start and end of a seam, which locks the stitches in place and prevents them from unraveling. This is especially important on high-stress areas like armholes or side seams. If you don’t backstitch, your seams might come apart over time. Most sewing machines have a backstitch function, making it easy to secure your work. Backstitching is a simple step that ensures your projects stay intact for the long haul.
How do I choose the appropriate needle and thread for different fabrics?
Choosing the right needle and thread is like selecting the perfect tool for the job. For lightweight fabrics like cotton, use a fine needle (size 70/10 or 80/12) and matching cotton or polyester thread. Heavier fabrics, like denim, need a thicker needle (size 90/14 or 100/16) and stronger thread. Stretchy fabrics, like knits, require a ballpoint needle to avoid snags, and a stretchy or polyester thread will work best. Make sure your needle matches your fabric’s weight and type, and your sewing will go smoother than ever. Choosing wisely ensures your projects stay durable and beautiful.